Visualizing Data with Maps in Excel 2010: A Comprehensive Guide
Related Articles: Visualizing Data with Maps in Excel 2010: A Comprehensive Guide
Introduction
With enthusiasm, let’s navigate through the intriguing topic related to Visualizing Data with Maps in Excel 2010: A Comprehensive Guide. Let’s weave interesting information and offer fresh perspectives to the readers.
Table of Content
Visualizing Data with Maps in Excel 2010: A Comprehensive Guide
Excel 2010, while known for its spreadsheet capabilities, also offers a powerful tool for visualizing data geographically: maps. This feature allows users to transform numerical data into visually compelling representations, enhancing understanding and facilitating insights that might otherwise be missed.
Understanding the Power of Maps in Excel
Maps in Excel 2010 serve as a bridge between raw data and meaningful interpretation. They provide a visual context for understanding patterns, trends, and relationships within datasets that relate to geographical locations. This capability makes them invaluable for various applications, including:
- Sales and Marketing: Analyzing sales performance by region, identifying customer demographics, and pinpointing potential growth areas.
- Finance: Visualizing investment returns by location, understanding market trends, and tracking economic indicators.
- Human Resources: Mapping employee distribution, analyzing workforce demographics, and identifying talent pools.
- Operations Management: Optimizing logistics routes, tracking inventory levels, and monitoring resource allocation across locations.
- Education: Illustrating geographical patterns in student performance, analyzing school district demographics, and visualizing educational outcomes.
Creating Maps in Excel 2010: A Step-by-Step Guide
To leverage the power of maps in Excel 2010, follow these steps:
- Prepare Your Data: Ensure your dataset includes a column with location data. This can be in the form of city, state, country, postal code, or latitude/longitude coordinates.
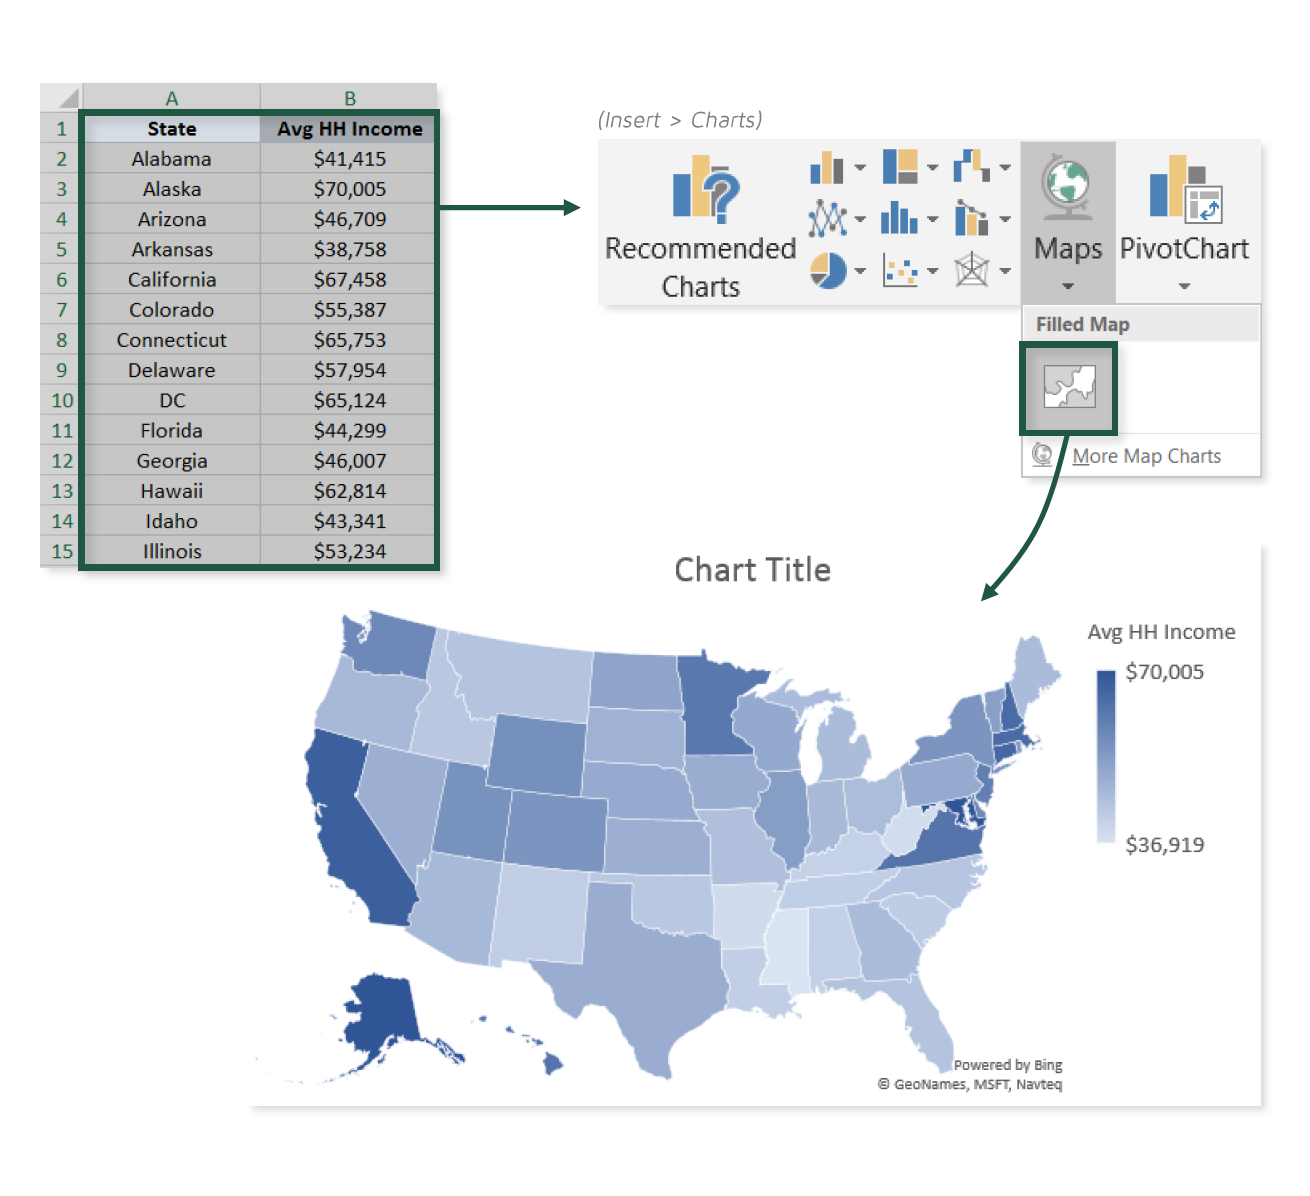
- Enable the Map Feature: Navigate to the "Insert" tab and select "Map" from the "Charts" group. Excel will prompt you to select the data range containing your location information.
- Choose Your Map Type: Select the desired map type from the available options. These include "Blank Map," "Filled Map," "Bubble Map," and "Pin Map."
- Customize Your Map: Excel offers extensive customization options to tailor the map to your specific needs. This includes adjusting the map style, colors, labels, and legend.
- Add Data Series: To visualize data on the map, select the data range containing the values you want to represent. Excel will automatically associate these values with the corresponding locations on the map.
- Format and Enhance: Further refine the map by adjusting its size, position, and adding additional elements like titles, labels, and annotations.
Types of Maps in Excel 2010: A Detailed Overview
Excel 2010 provides a range of map types, each offering unique visual representations for different data types and analytical objectives:
- Blank Map: A basic map displaying geographical boundaries without any data visualization. This serves as a foundation for adding data series and customizing the map further.
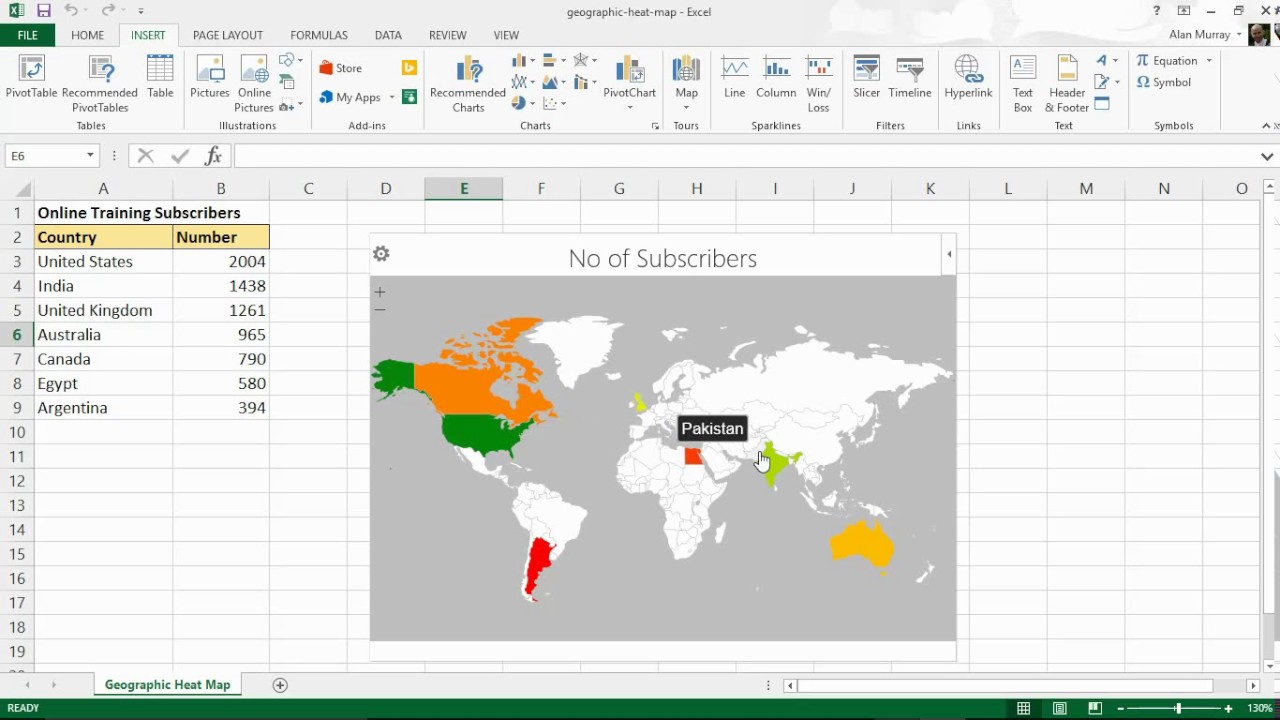
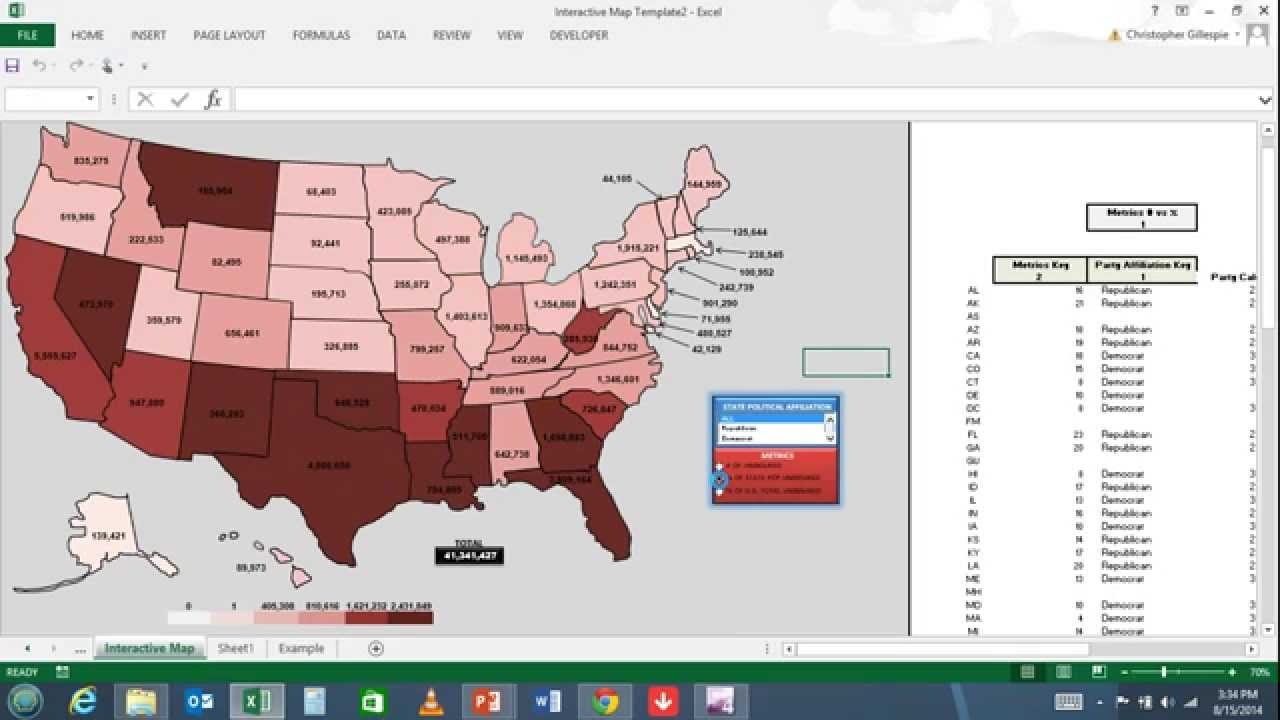
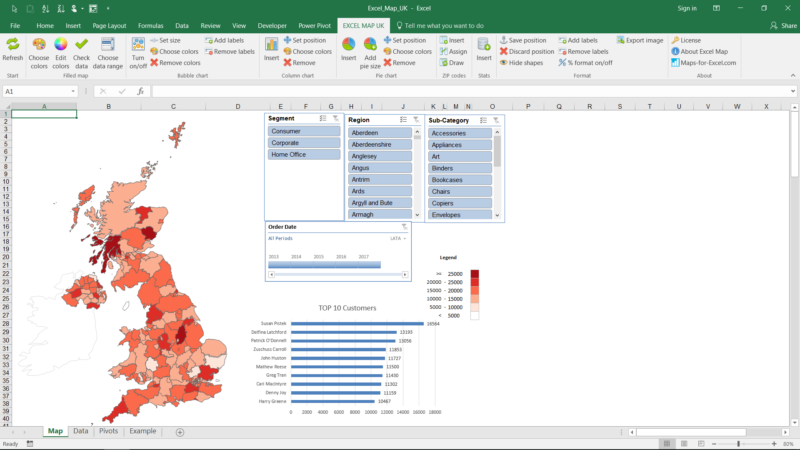
- Filled Map: A map where each region is filled with a color based on a specific data value. This allows for visual comparison of data across regions and identification of areas with high or low values.
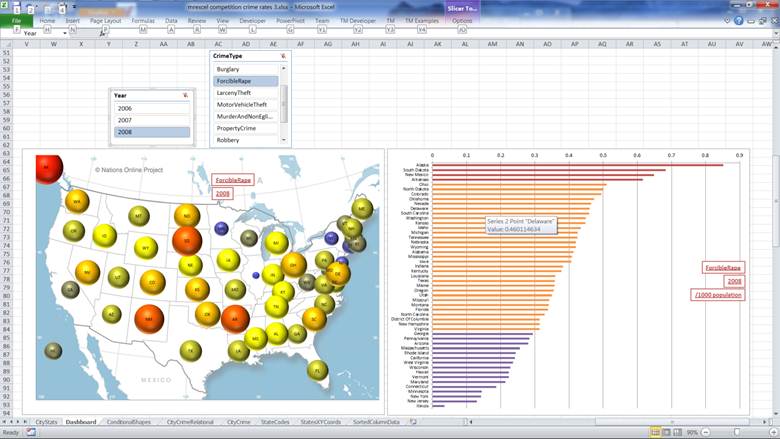
- Bubble Map: A map where data values are represented as bubbles, with the size of each bubble proportional to the corresponding value. This effectively highlights areas with significant data values.
- Pin Map: A map where data points are represented as pins, with the location and color of each pin reflecting a specific data value. This is useful for visualizing individual data points and their spatial distribution.
Leveraging Advanced Map Features for Enhanced Insights
Beyond the basic map types, Excel 2010 offers several advanced features to enhance map visualization and analysis:
- Map Styles: Choose from various map styles, including "Road," "Aerial," and "Satellite," to adjust the map’s appearance and emphasize different geographical features.
- Data Labels: Add labels to the map to display specific data values for each region or data point. This provides additional context and facilitates data interpretation.
- Legends: Include legends to explain the meaning of different colors, sizes, or symbols used on the map. This ensures clear understanding of the data representation.
- Data Filtering: Filter the data displayed on the map based on specific criteria, allowing for focused analysis of subsets of data.
- Map Animations: Create dynamic map animations to illustrate changes in data over time, providing a compelling visual narrative.
FAQs about Maps in Excel 2010
Q1: What data types can be visualized on maps in Excel 2010?
A: Maps in Excel 2010 can visualize various data types, including numerical data (e.g., sales figures, population density), categorical data (e.g., customer segments, product categories), and time-series data (e.g., sales trends over time).
Q2: Can I use custom maps in Excel 2010?
A: While Excel 2010 offers pre-defined map templates, it does not directly support the use of custom maps. However, you can import custom map data in CSV format and create a custom map using the "Blank Map" option.
Q3: Can I export maps from Excel 2010?
A: Yes, you can export maps created in Excel 2010 in various formats, including image files (e.g., PNG, JPEG), PDF, and even HTML for web integration.
Q4: What are the limitations of maps in Excel 2010?
A: While powerful, maps in Excel 2010 have limitations. They are not designed for complex geospatial analysis, and their ability to handle large datasets may be limited.
Tips for Creating Effective Maps in Excel 2010
- Choose the Right Map Type: Select the map type that best suits the data type and analytical objective.
- Use Clear and Concise Labels: Ensure labels are legible and provide meaningful information.
- Optimize Color Schemes: Select color palettes that enhance contrast and facilitate data interpretation.
- Maintain Consistency: Use consistent formatting and styling throughout the map to ensure visual coherence.
- Include a Clear Legend: Provide a legend to explain the meaning of different symbols, colors, or sizes used on the map.
- Focus on Key Insights: Highlight the most important data points and trends through visual emphasis.
Conclusion: Empowering Data Visualization with Maps in Excel 2010
Maps in Excel 2010 provide a powerful tool for visualizing data geographically, enhancing understanding, and facilitating insights. By transforming numerical data into visually compelling representations, maps empower users to uncover patterns, trends, and relationships that might otherwise be missed. By leveraging the features and techniques outlined in this guide, users can effectively harness the power of maps in Excel 2010 to gain valuable insights from their data and make informed decisions.


Closure
Thus, we hope this article has provided valuable insights into Visualizing Data with Maps in Excel 2010: A Comprehensive Guide. We appreciate your attention to our article. See you in our next article!